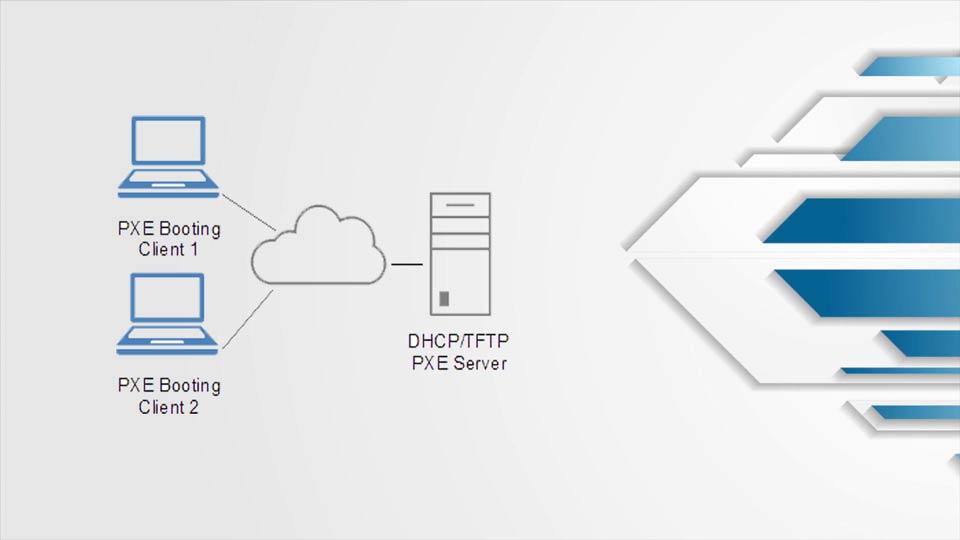
PXE stands for Preboot eXecution Environment, which will help to install a system in the network without using physical media. Unlike traditional installation methods, we can install any system in the network without having a CD/DVD or USB drives. It is used to enable a network computer to boot only from a network interface card. This method will be very helpful if a System Administrator wants to install many systems that don’t have a CD/DVD device on the network.
With the help of the PXE server, we can install hundreds of systems at the same time.
My test box (PXE server) details
Operating System: CentOS 7 Minimal.
IP Address: 192.168.10./24.
SELinux: Disabled.
Firewalld: Enable.
In this tutorial, we will learn how to install the PXE server on CentOS 7 with The existing DHCP and install CentOS 7 on the client machine.
Step 1: Install required packages for PXE Setup
To install and configure the PXE server, need the following packages. “Dnsmasq, TFTP-server, syslinux, vsftpd”. Open the terminal with administrative privilege and execute the below command.
[root@pxe ~]# yum -y install dnsmasq tftp-server syslinux vsftpd
Step 2: Configure Dnsmasq Server
Dnsmasq default configuration file is located in /etc directory.
Note: Take a backup before editing any configuration file.
Run the following command to take the Dnsmasq configuration file backup.
[root@pxe ~]# cp /etc/dnsmasq.conf /etc/dnsmasq.conf.bkp
After backup, open the configuration file with your favorite editor.
[root@pxe ~]# vi /etc/dnsmasq.conf
Delete all the content of the file, copy and paste the below content.
# Port Options
port=0
interface=ens160,lo  # Replace the port name as your server.

# DHCP Options
dhcp-range=192.168.1.1,proxy,255.255.255.0 # Replace your dhcp server IP and subnet mask here.
dhcp-option=vendor:PXEClient,6,2b
dhcp-no-override

# PXE
dhcp-boot=pxelinux.0
pxe-service=X86PC, "CentOS 7 PXE boot ", pxelinux

# TFTP Options
enable-tftp
tftp-root=/var/lib/tftpboot
Once edited, save the file.
Step 3: SYSLINUX Bootloaders
SYSLINUX is a boot loader for the Linux operating system which runs on an MS-DOS/Windows FAT filesystem. It is intended to simplify the first-time installation of Linux, and for creation of rescue and other special-purpose boot disks.
Copy all bootloaders files provided by the Syslinux package from /usr/share/syslinux to /var/lib/tftpboot path by executing the following commands.
[root@pxe ~]# cp -r /usr/share/syslinux/* /var/lib/tftpboot
Step 3: Mount the CentOS ISO
In this step, we will mount the CentOS 7 ISO and copy the kernel files into tftp-boot directory.
[root@pxe ~]# mkdir -P /opt/iso
Download or copy the CentOS 7 ISO to /opt/iso path. After the download create a directory in /var/ftp/ path, to mount the ISO by executing below command.
[root@pxe ~]# mkdir -P /var/ftp/CentOS-7
Mount the ISO to /var/ftp/CentOS-7 path, by executing the below command.
[root@pxe ~]# mount -o loop /opt/iso/CentOS-7-x86_64-DVD-1810.iso /var/ftp/CentOS-7
If you want to mount the disk permanently, you have to make the below entry in /etc/fstab.
[root@pxe ~]# vi /etc/fstab
Result:
Add the below line in the fstab file and save it.
/opt/iso/ CentOS-7-x86_64-DVD-1810.iso /var/ftp/CentOS-8 iso9660 defaults,loop 0 0
Once you edited the /etc/fstab file, execute the below command to make sure is everything is proper and mount the drive.
[root@pxe ~]# mount -a
Note: This will work as you local centos mirror through FTP.
Note: If there is an issue in /etc/fstab, you should solve it before restarting the server, otherwise the OS will not boot properly.
Step 4: PXE Server Configuration File
Create the pxelinux.cfg directory and populate it with the default file by using the following command.
[root@pxe ~]# mkdir /var/lib/tftpboot/pxelinux.cfg
[root@pxe ~]# touch /var/lib/tftpboot/pxelinux.cfg/default
Open the PXE server configuration file with your favorite editor and edit it as follows. Remember that all paths used in this file must be relative to the /var/lib/tftpboot directory.
[root@pxe ~]# vi /var/lib/tftpboot/pxelinux.cfg/default
Add the following lines as per your configuration.
default vesamenu.c32
prompt 0
MENU TITLE PXE Server Boot Menu
# Local Hard Disk pxelinux.cfg default entry
LABEL 1
MENU LABEL ^1) Boot local hard drive
menu default
localboot 0
timeout 600
TOTALTIMEOUT 60000
# CentOS 7 pxelinux.cfg default entry
LABEL 2
MENU LABEL ^2) Install CentOS-7
KERNEL /CentOS7/vmlinuz
APPEND initrd=/CentOS7/initrd.img inst.ks=ftp://192.168.1.10/ks.cfg
Save the file. how to create anaconda file ks.cfg for automated installation .
Step 5: Copy CentOS 7 Boot Images to TFTP boot
For this setup, we need CentOS kernel and initrd file for the initial boot. Copy the kernel and initrd file from the mounted disk by using the following command.
[root@pxe ~]# mkdir /var/lib/tftpboot/CentOS7
[root@pxe ~]# cp /var/ftp/CentOS-7/images/pxeboot/vmlinuz /var/lib/tftpboot/CentOS7
[root@pxe ~]# cp /var/ftp/CentOS-7/images/pxeboot/initrd.img /var/lib/tftpboot/CentOS7
Step 6: Start and Enable the services
Client machines to reach the PXE server and boot the OS from the server. Open the DNSMASQ, VSFTPD and TFTP boot ports in the firewall by using the following commands.
firewall-cmd –add-service=ftp –permanent
firewall-cmd –add-service=dns –permanent
firewall-cmd –add-service=dhcp –permanent
firewall-cmd –add-port=69/udp –permanent
firewall-cmd –add-port=4011/udp –permanent
firewall-cmd –reload
Step 8: Boot the client from the network
Configure the client machine to boot for the network by editing system BIOS or F12 key. Now you should able to see the PXE menu, select Install CentOS-7, and press enter.
That’s all for “how-to configure the PXE server with dhcp proxy“. Please refer to How to create anaconda/ks .cfg/kickstart file for unattended installation.
Thank you for another wonderful article. Where else could anybody get that type of information in such a perfect way of writing? I’ve a presentation next week, and I am on the look for such information.